All about the space plan
Join me for a chat about the before and after layout of our farmhouse bathroom. If you are interested in the materials selected – link here to that post.
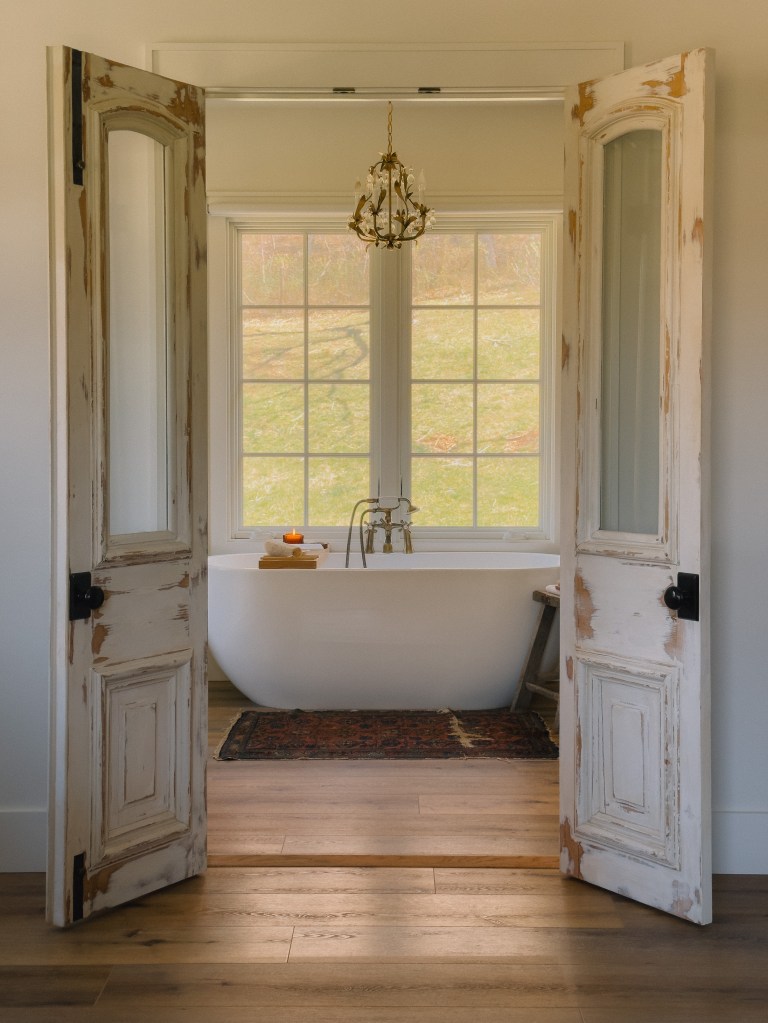
Entry to the bathroom
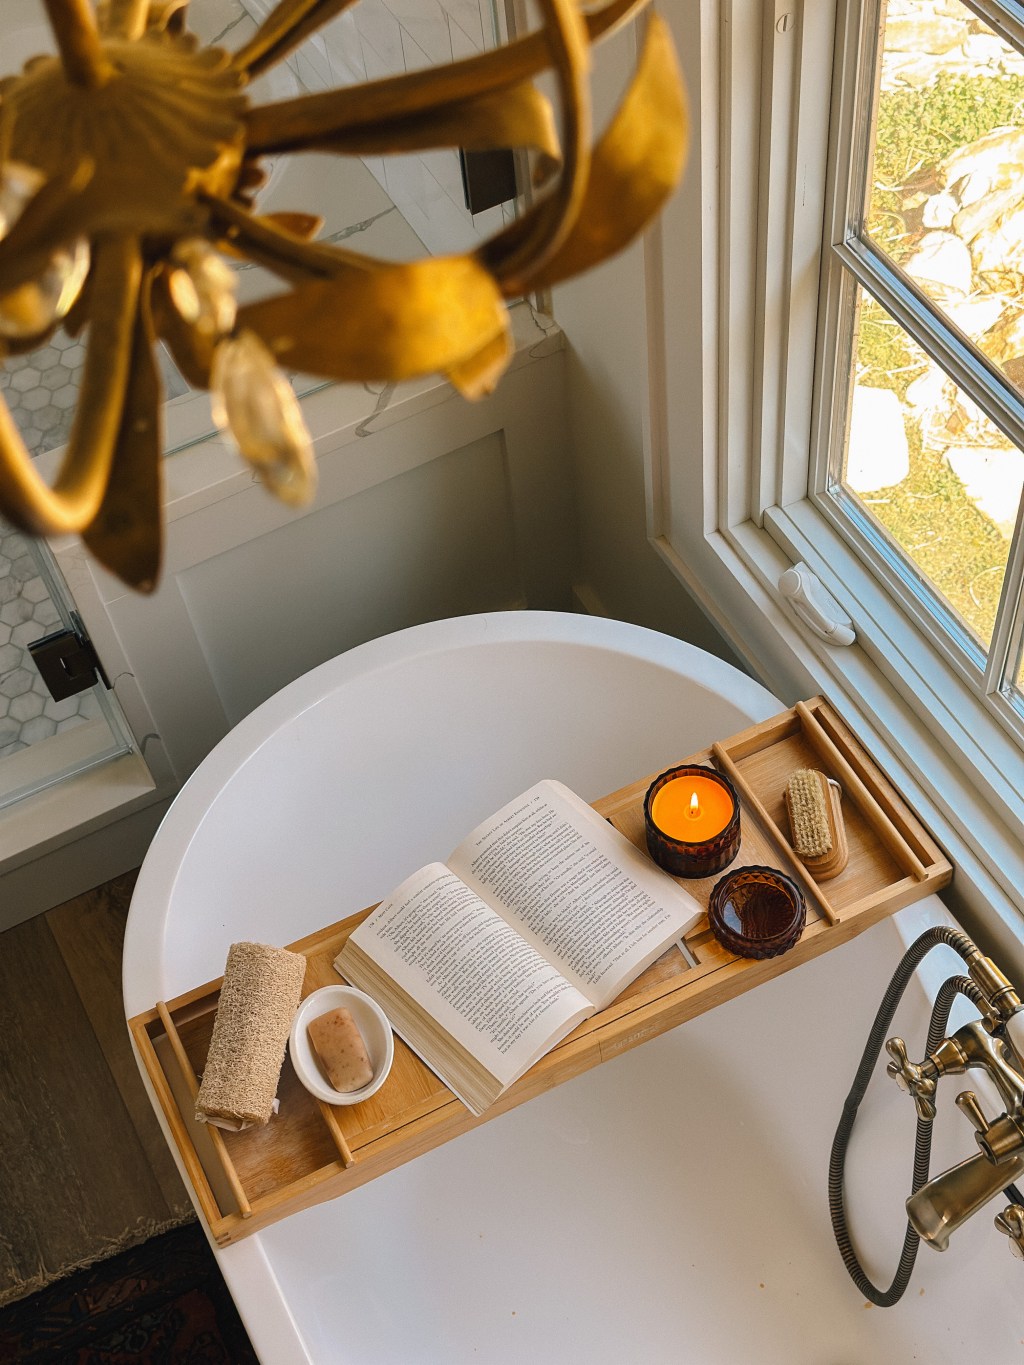
I love this moment where the salvaged doors draw your eye toward the freestanding tub. The old window was replaced with a larger casement window. And I rewired this vintage chandelier that I found at a local barn show. (More about that later!)
The doors were a FB Marketplace find and it’s amazing what a little sanding and a few coats of Minwax Polycrylic can do!


Shower with window and water closet


We added the water closet after relocating the washer/dryer. And decided to leave the window in the shower. The flooring is LVP and I plan to do a blog post all about that soon and will link it here. A few things about the layout of the water closet – you really need a minimum of 32″ x 5′ to not feel cramped. Ours ended up at 3′ x 5’6″ and I’m happy with that size. We have a 2′ door that swings in with plenty of space.
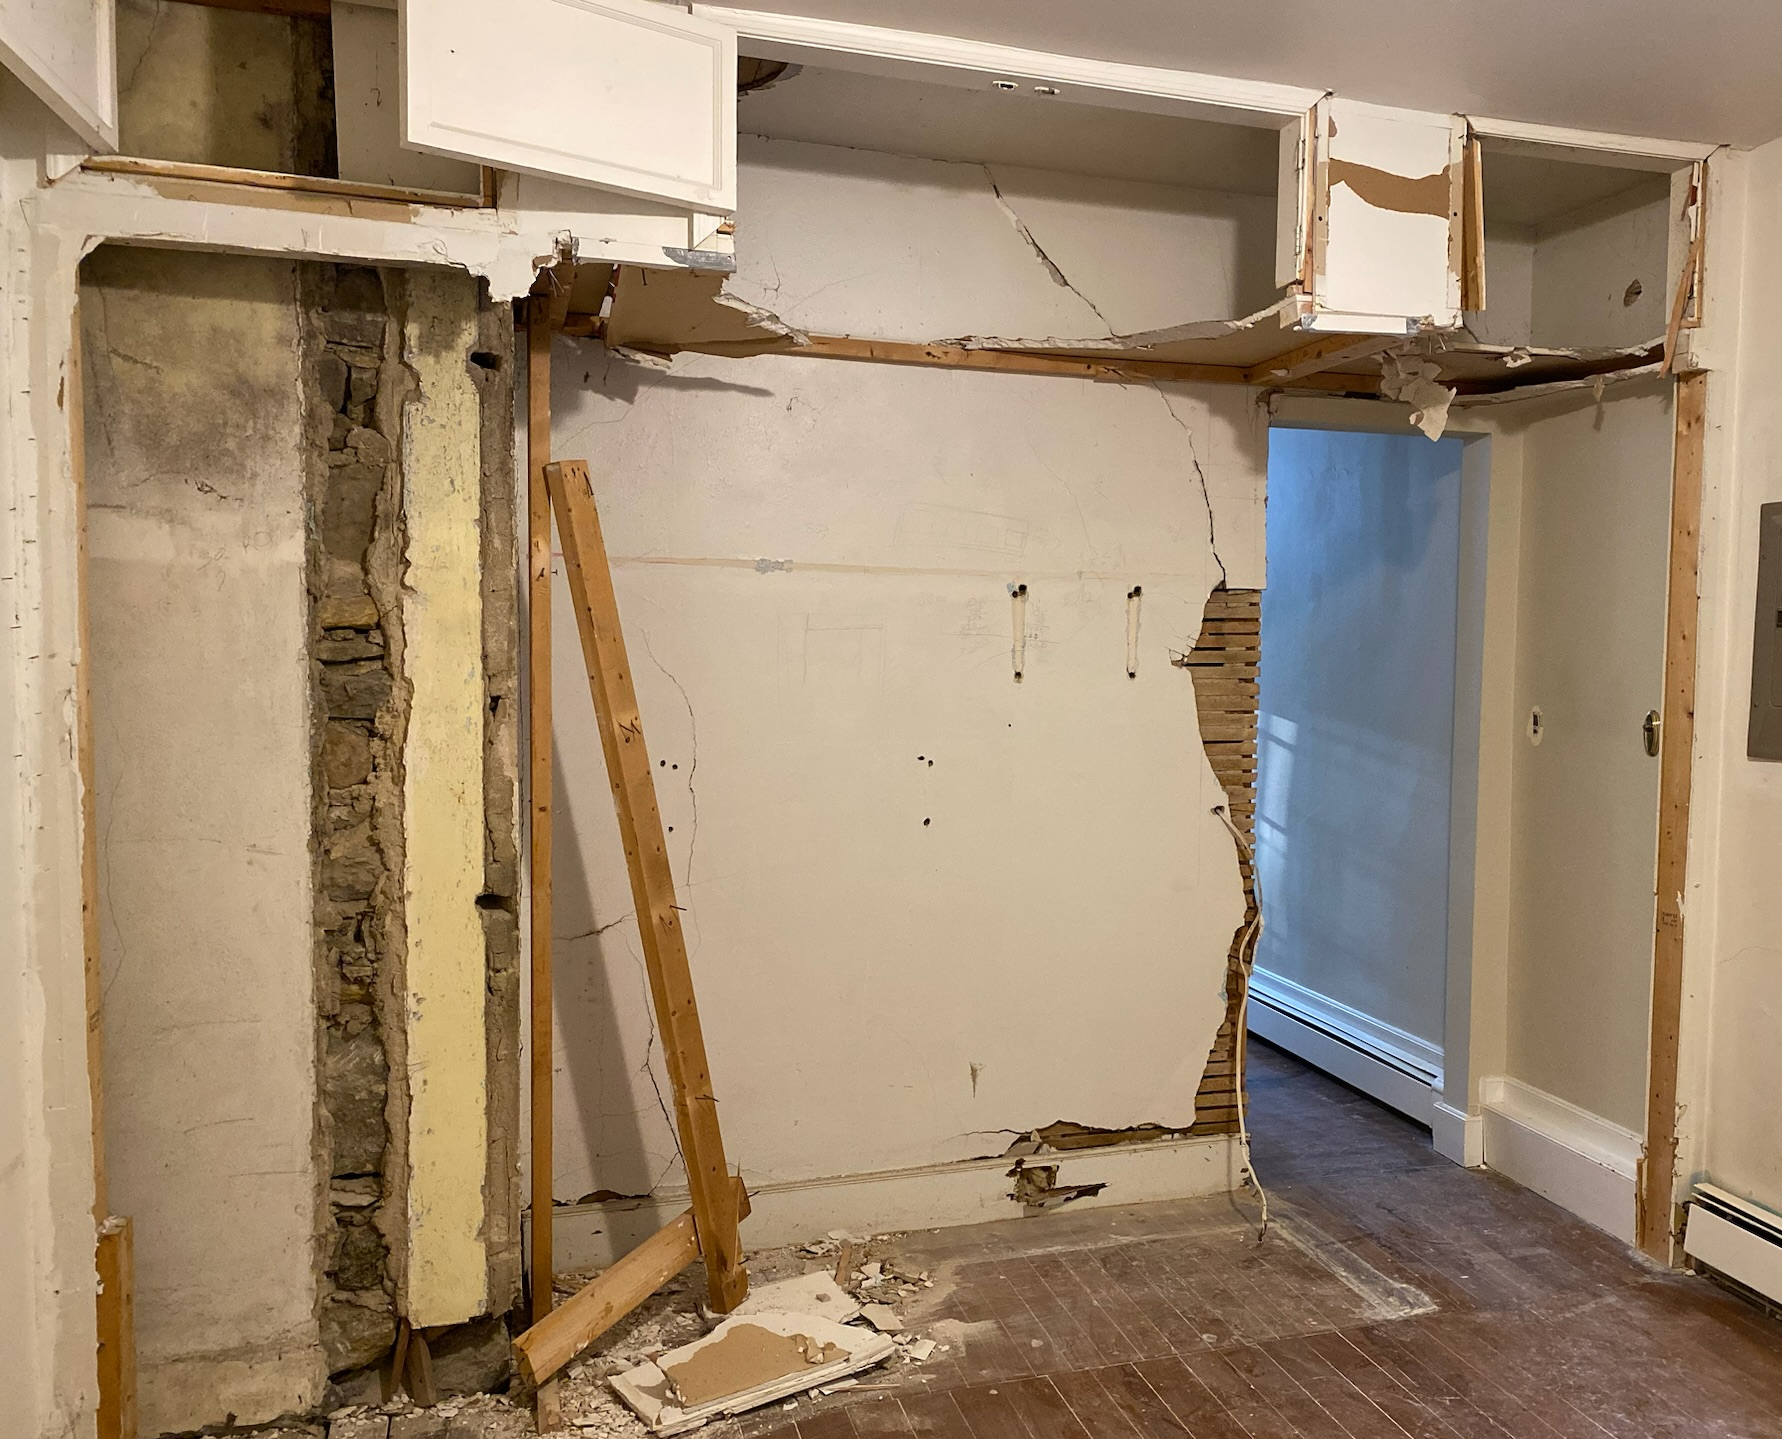
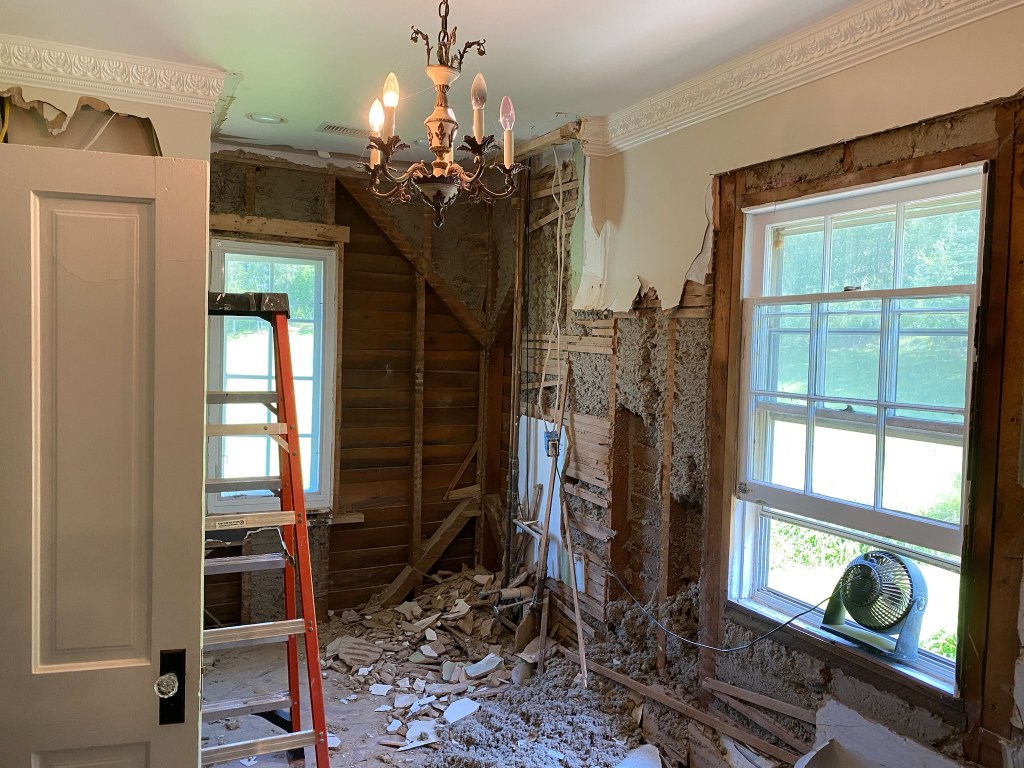
Pre construction photos
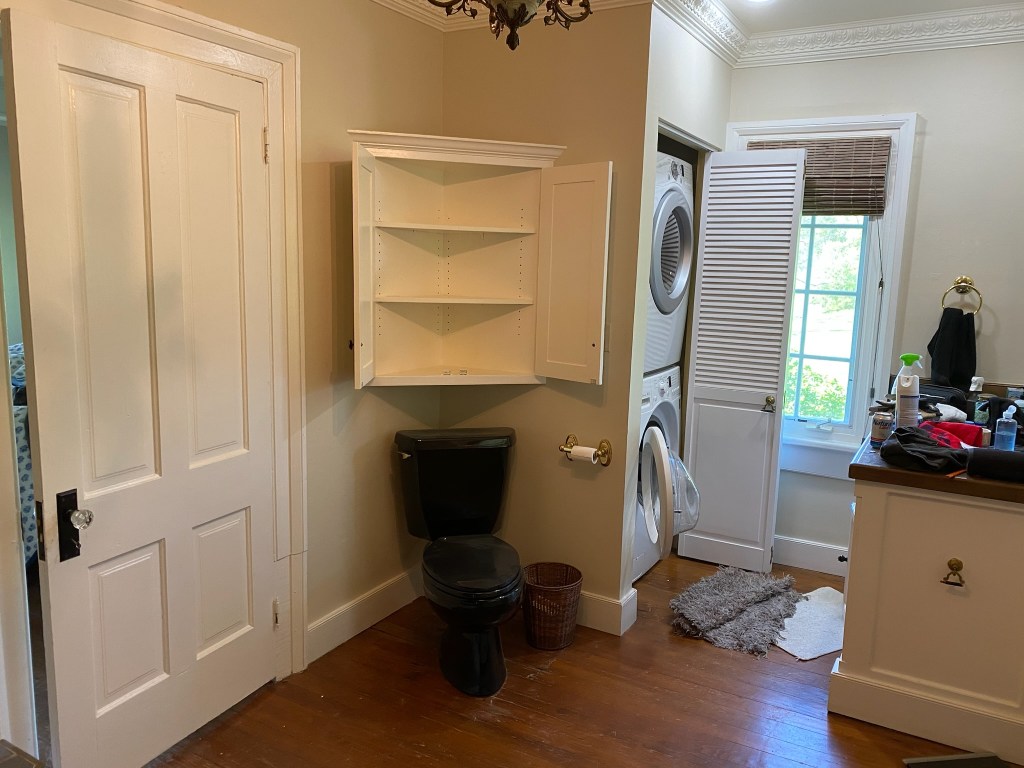
It is going to be hard describe how awful the original bathroom looked. Bad layout, bad materials and the strangest tub/shower combo I have ever seen (I refused to use it!) And because of the awfulness I did not take ONE SINGLE before photo but fortunately I was able to find a few on the hubby’s phone. Please take note of the unique diagonal black toilet – apparently they could not decide how to face it so instead split the difference. NOT a good design choice. And the soaking tub/shower combo where you had to step up and in to start the shower. Humm…
Before Pics – check out that black corner toilet!

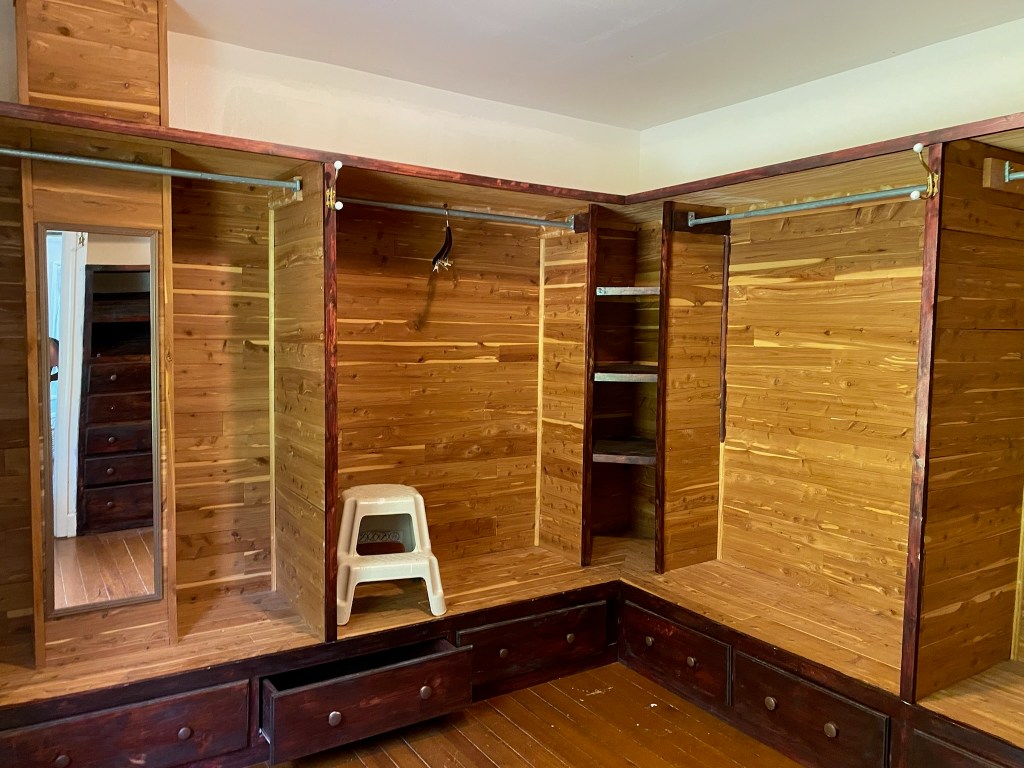
We took some room from the back of our closet and created a laundry room that opens to the hallway. Essentially I lost 5 feet from my closet by adding that wall. It was definitely a struggle to find the best layout for a long narrow bathroom!
The bathroom is approximately 8.5′ wide x 20′ long.
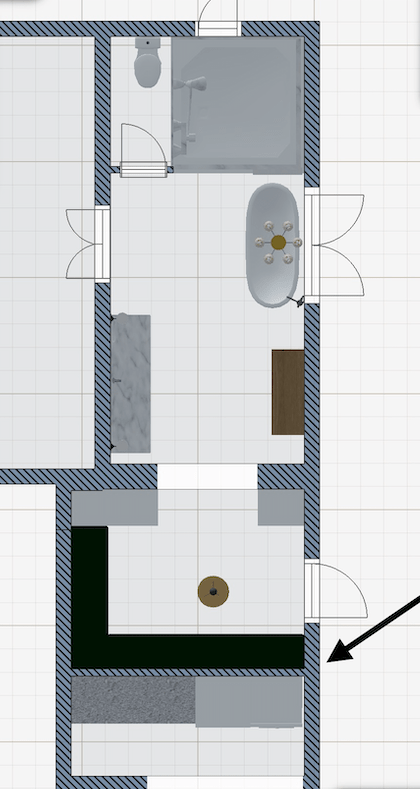
Planning the layout
Here is the final layout – the arrow shows the location of the new wall. I like to use HomeDesign 3D on my iPad for quick planning – it is user friendly and an easy way to experiment with space planning and visualizing the space in 3D.

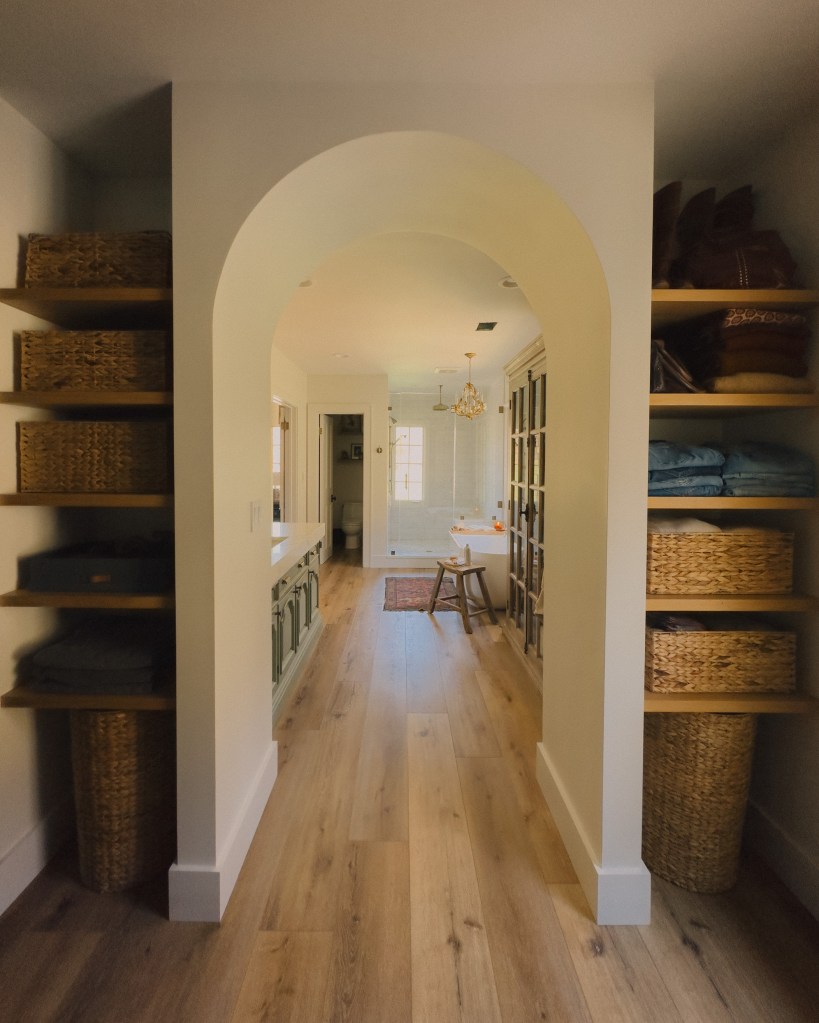
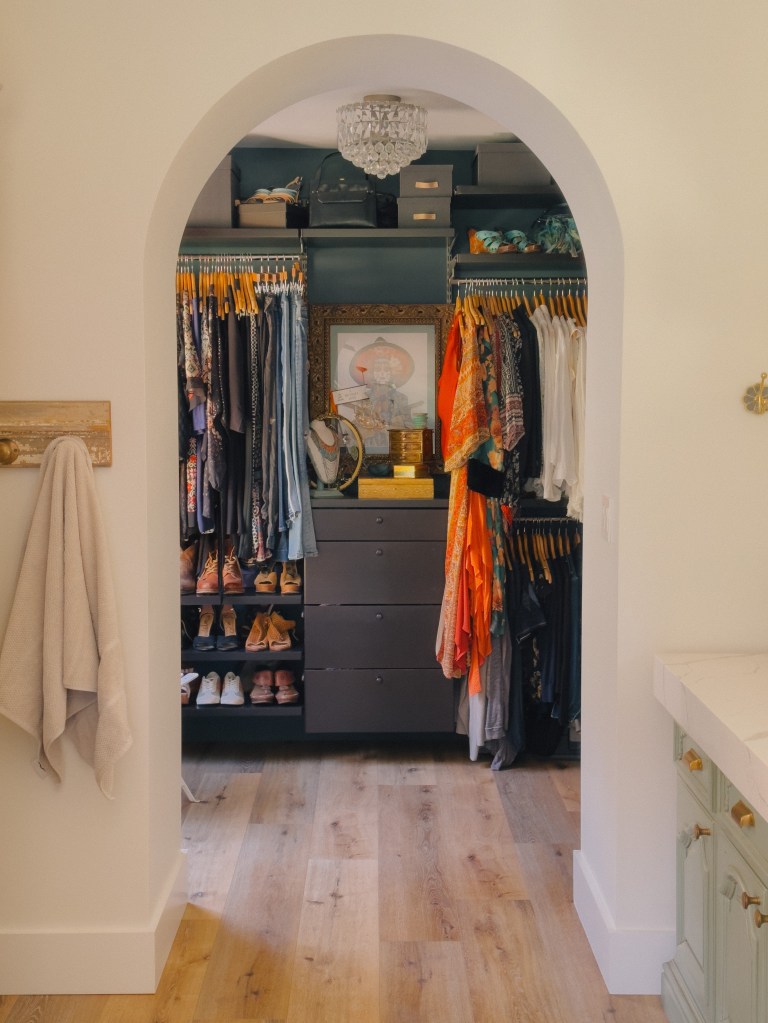
Arched entry between closet and bathroom
One of my favorite details in our new space is this arched opening between the bathroom and closet. The original 2′ opening was much too narrow. We made it 4′ wide and shifted it to center. The archway is 24″ deep to accommodate the built in white oak shelves in our closet.
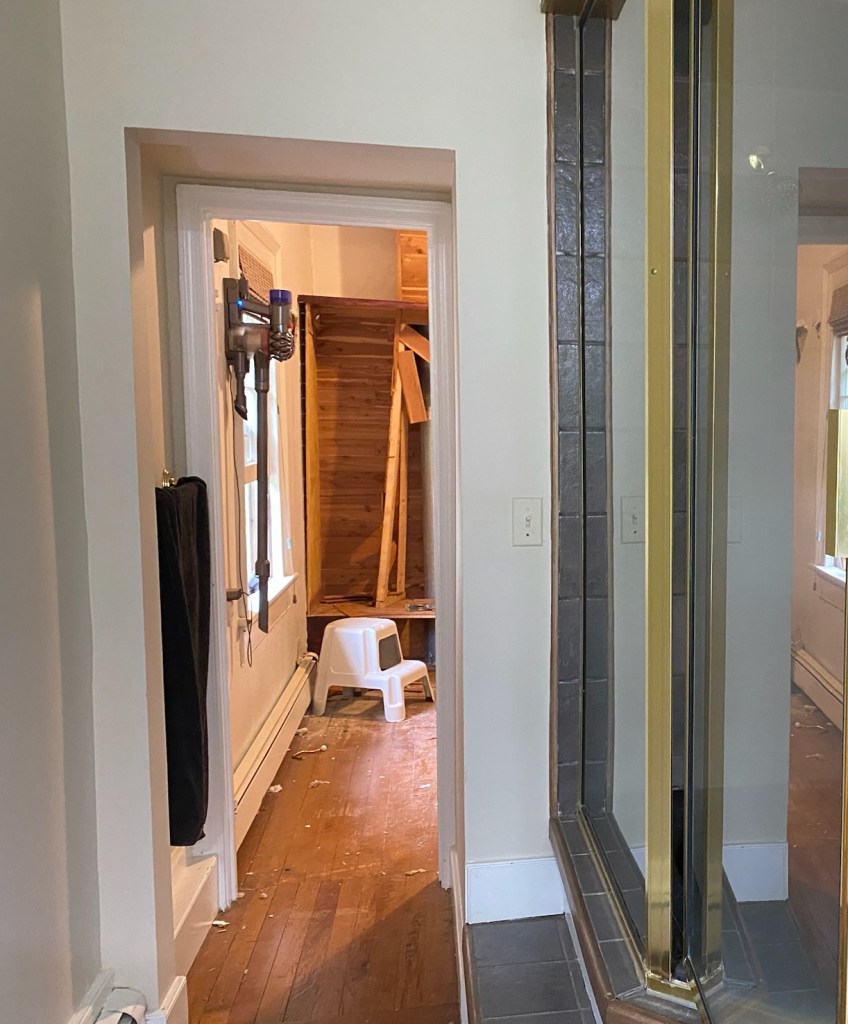
Before photos of opening